Daily working time
Overview
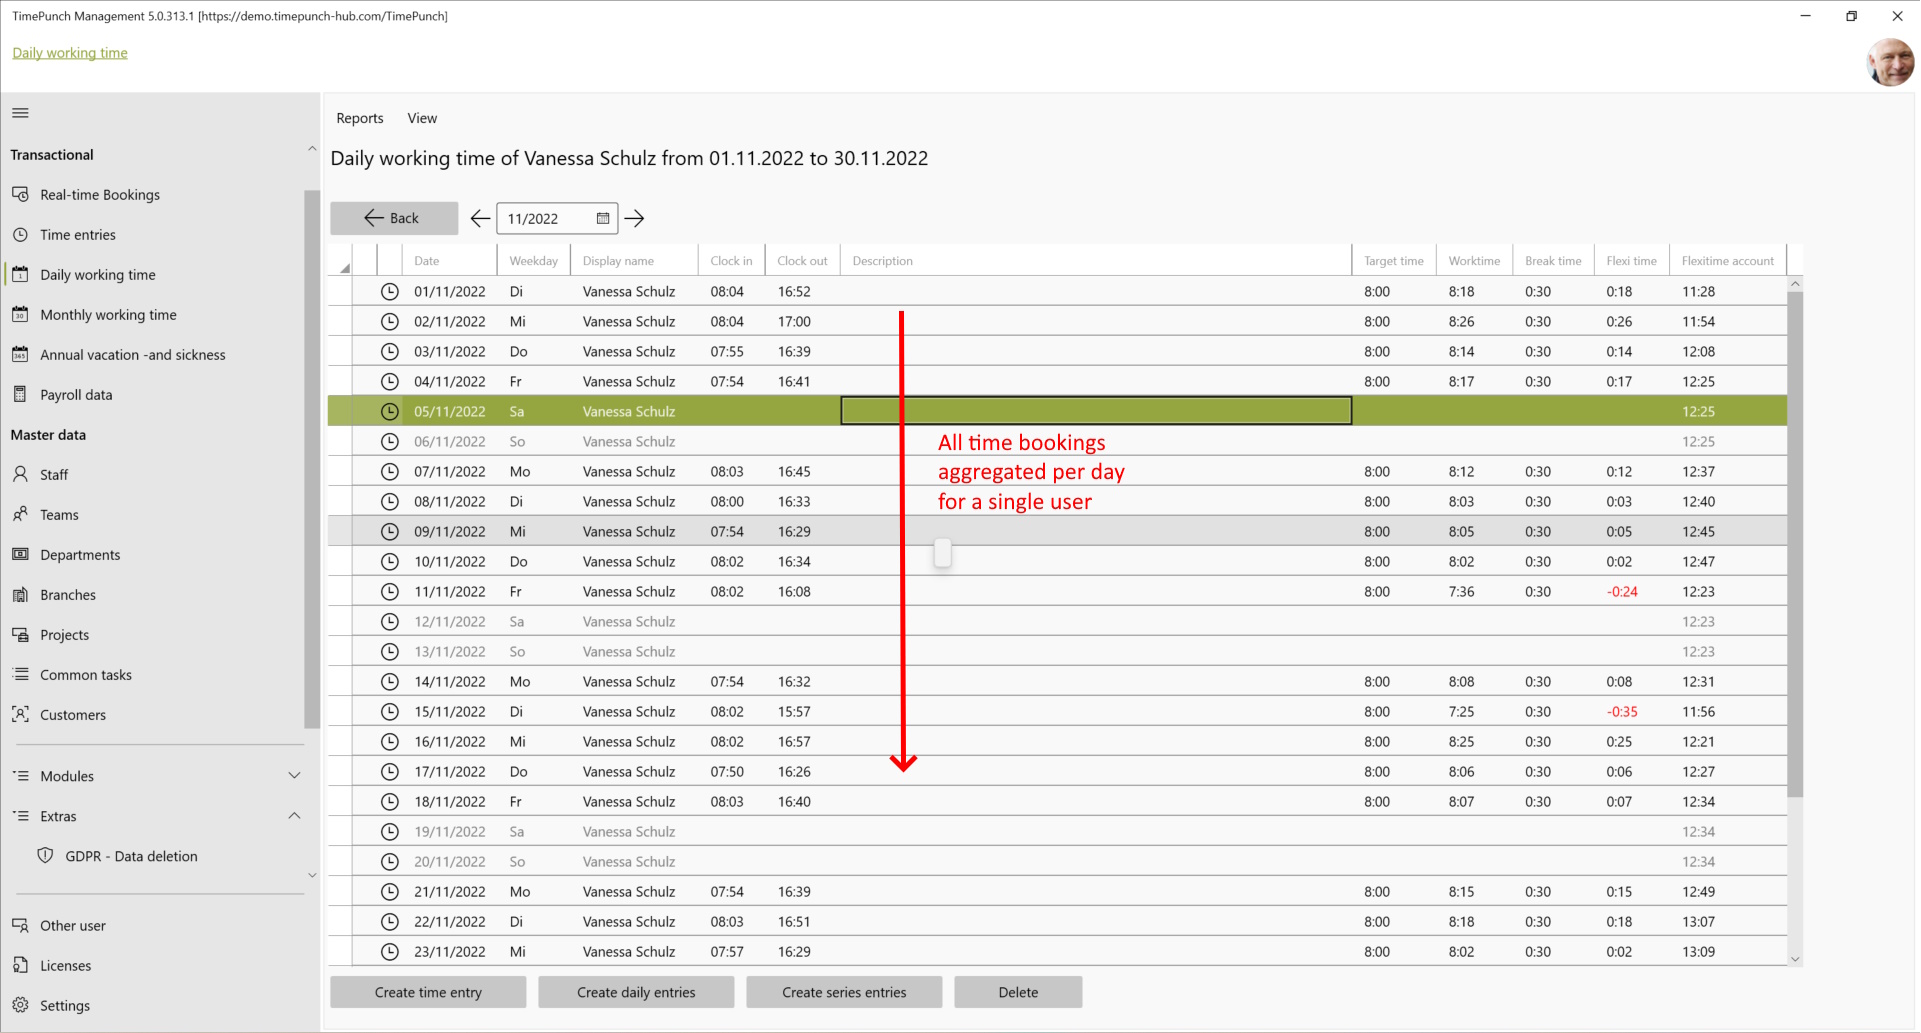
On the "Daily working hours" page, the working hours of the employees are aggregated to one day and displayed in summary form. This provides a quick and easy overview of the employees' working hours and flexitime.

Aggregated times per month per employee
It is also possible to navigate to the daily aggregated working times of an individual employee using the inline navigation. To do so, click on the calendar icon in the corresponding row of the employee.
Entering holidays and sick leave
The ‘Create daily entries’ button can be used to record absences such as holidays or sick leave for a single day or several days at once.
To do this, proceed as follows:
- Select the desired time period.
- Click on ‘Create daily entries’.
- Select the appropriate entry type (e.g. holiday or sickness).

Working days and weekends
- Holidays and sickness can only be entered on working days.
- The booking type ‘Absence’ is an exception: This can also be entered at weekends to explicitly mark days as non-working days. This improves clarity, especially for employees who occasionally work at weekends.
Tip 💡 If several employees are selected on the ‘Daily working time’ or ‘Monthly working time’ page and then ‘Create daily entries’ is clicked, the entries are created for all selected employees at the same time.
This is helpful, for example, for centrally recording company holidays for all employees.
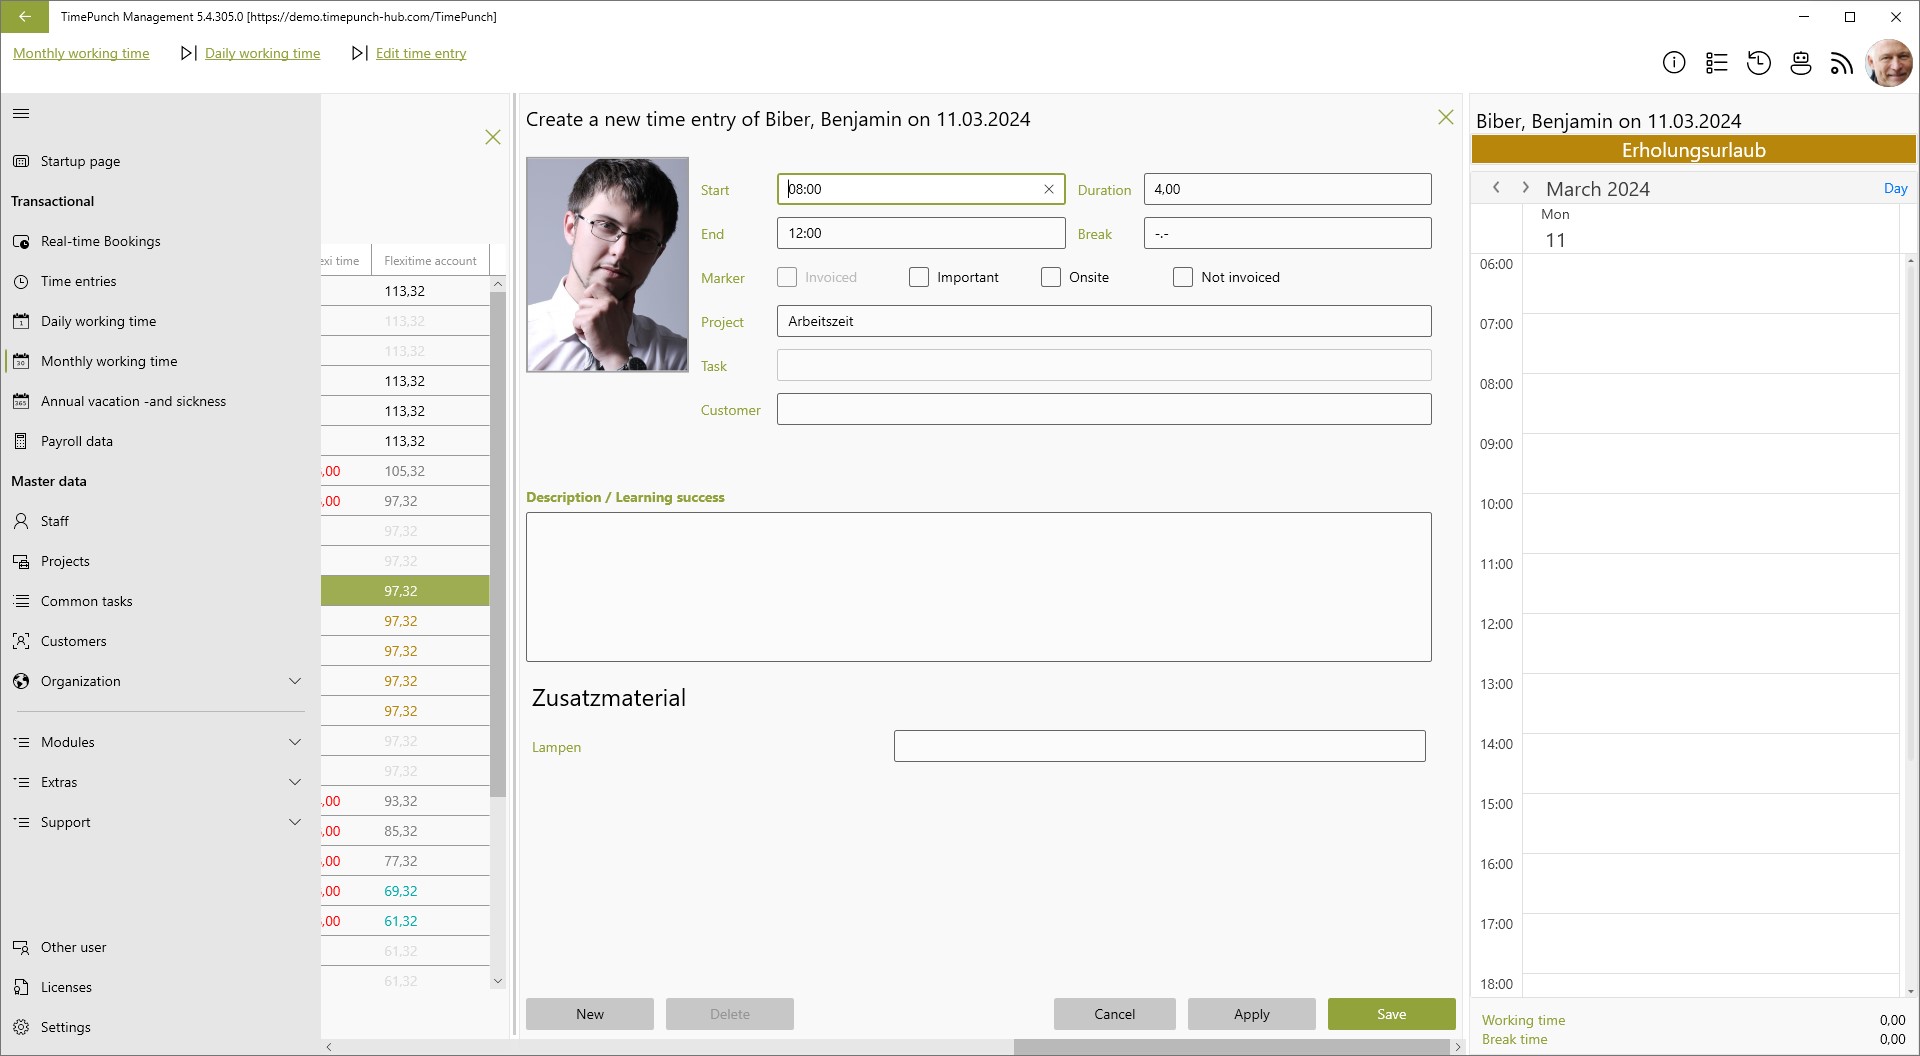
Display / edit daily entries
Double-click on a line in the daily working times to open the dialog for editing the selected day.
In the daily overview on the right-hand side, all time entries per day are displayed. Half-day or full-day entries are displayed above the calendar in the form of a colored label. The entry can be edited by clicking on the label. The same applies to time entries in the daily overview. These can be opened for editing by double-clicking.
Entering vocational school or other series entries
Series entries often have to be created in advance, e.g. because the employee (trainee) does not have the possibility to book himself/herself. A classic example of this is vocational school.
In order to enter such entries quickly and easily, all vocational school students should be selected via a filter in the previous screen and then selected. If one then clicks the button "Create series entries", the following dialogue is displayed.
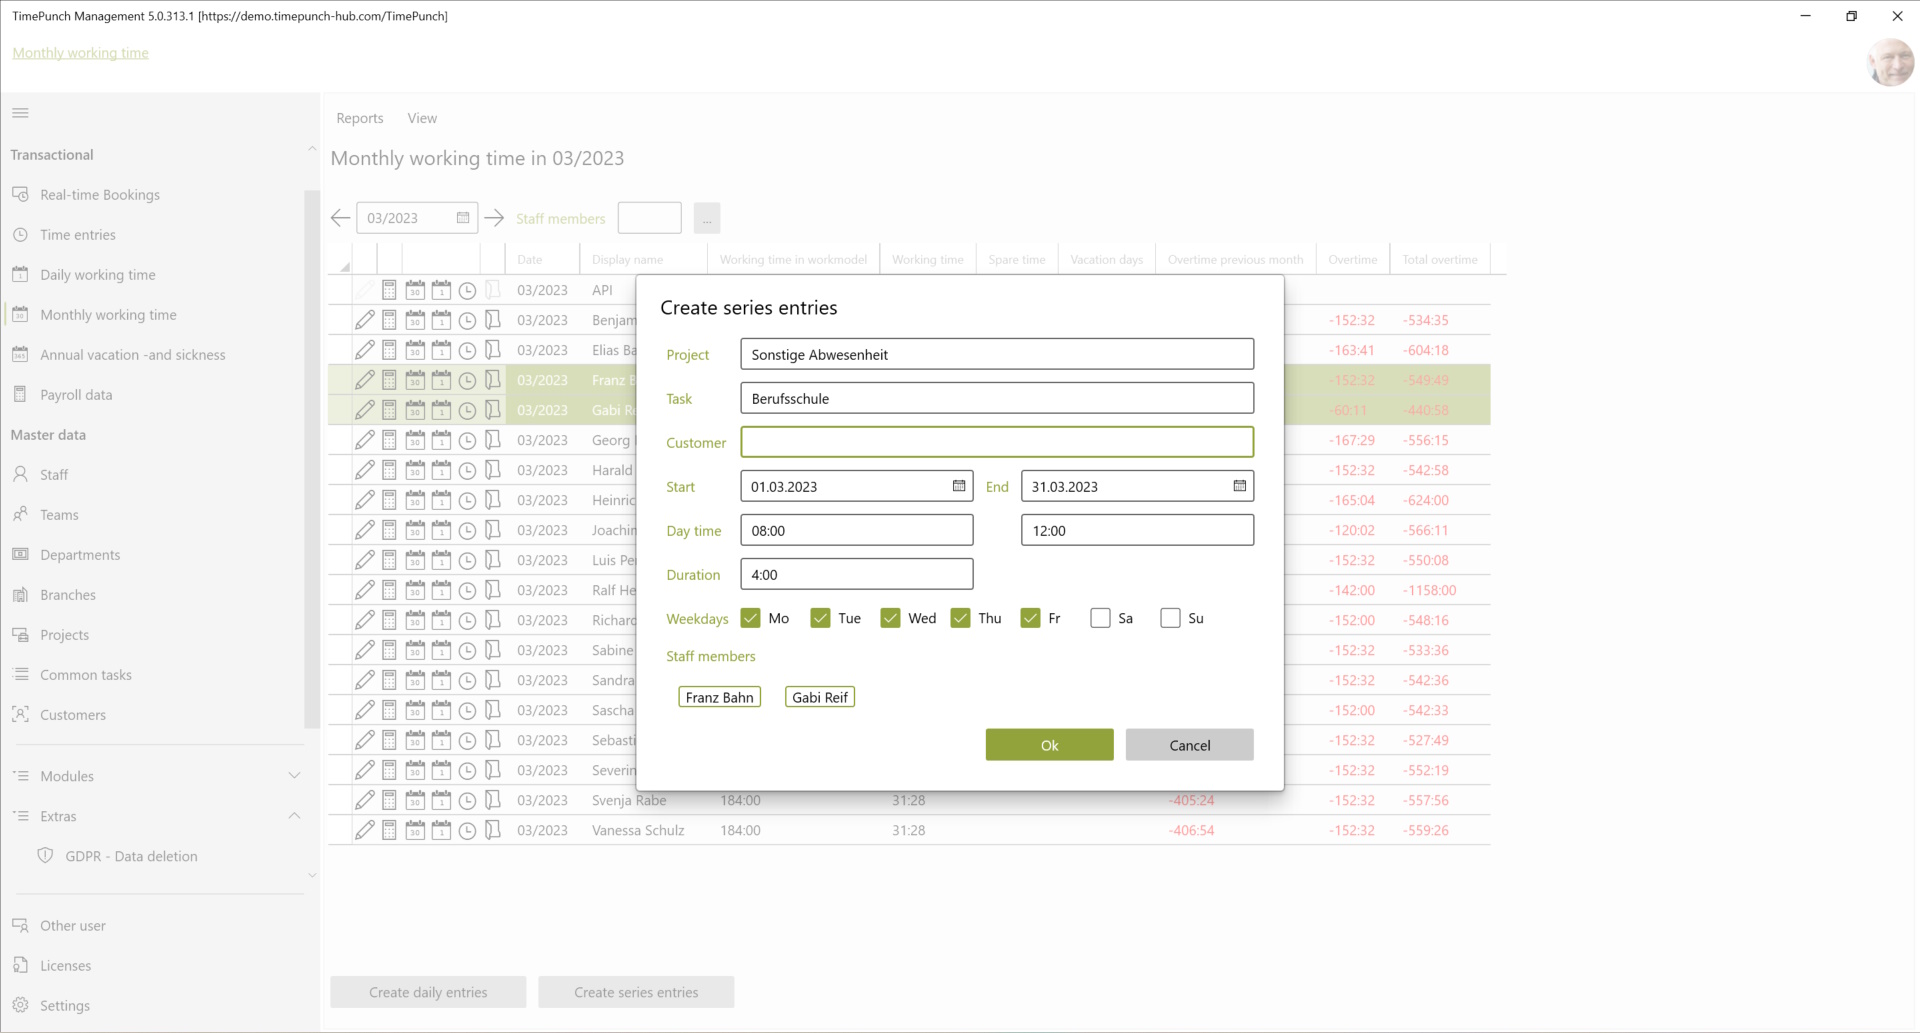
Tip : Here the weekdays and the respective start and end times of the entries can be specified. By selecting the employees, the series entries are created for all selected employees.
Overtime limits with and without payment
In the [employee profiles](../Master data/employees#working time regulations), regular overtime limits and payments are defined on a monthly basis by default.
In addition to these fixed rules, TimePunch offers the option of agreeing and recording spontaneous overtime limits or payments on a daily basis.
Recording daily overtime limits
The corresponding function can be found in the context menu of the daily working hours under the item ‘Overtime limit’.
Procedure:
- Select the day for which the overtime limit and/or payment is to apply.
- Select ‘Overtime limit’ from the context menu.
- Make the desired settings in the dialogue box.
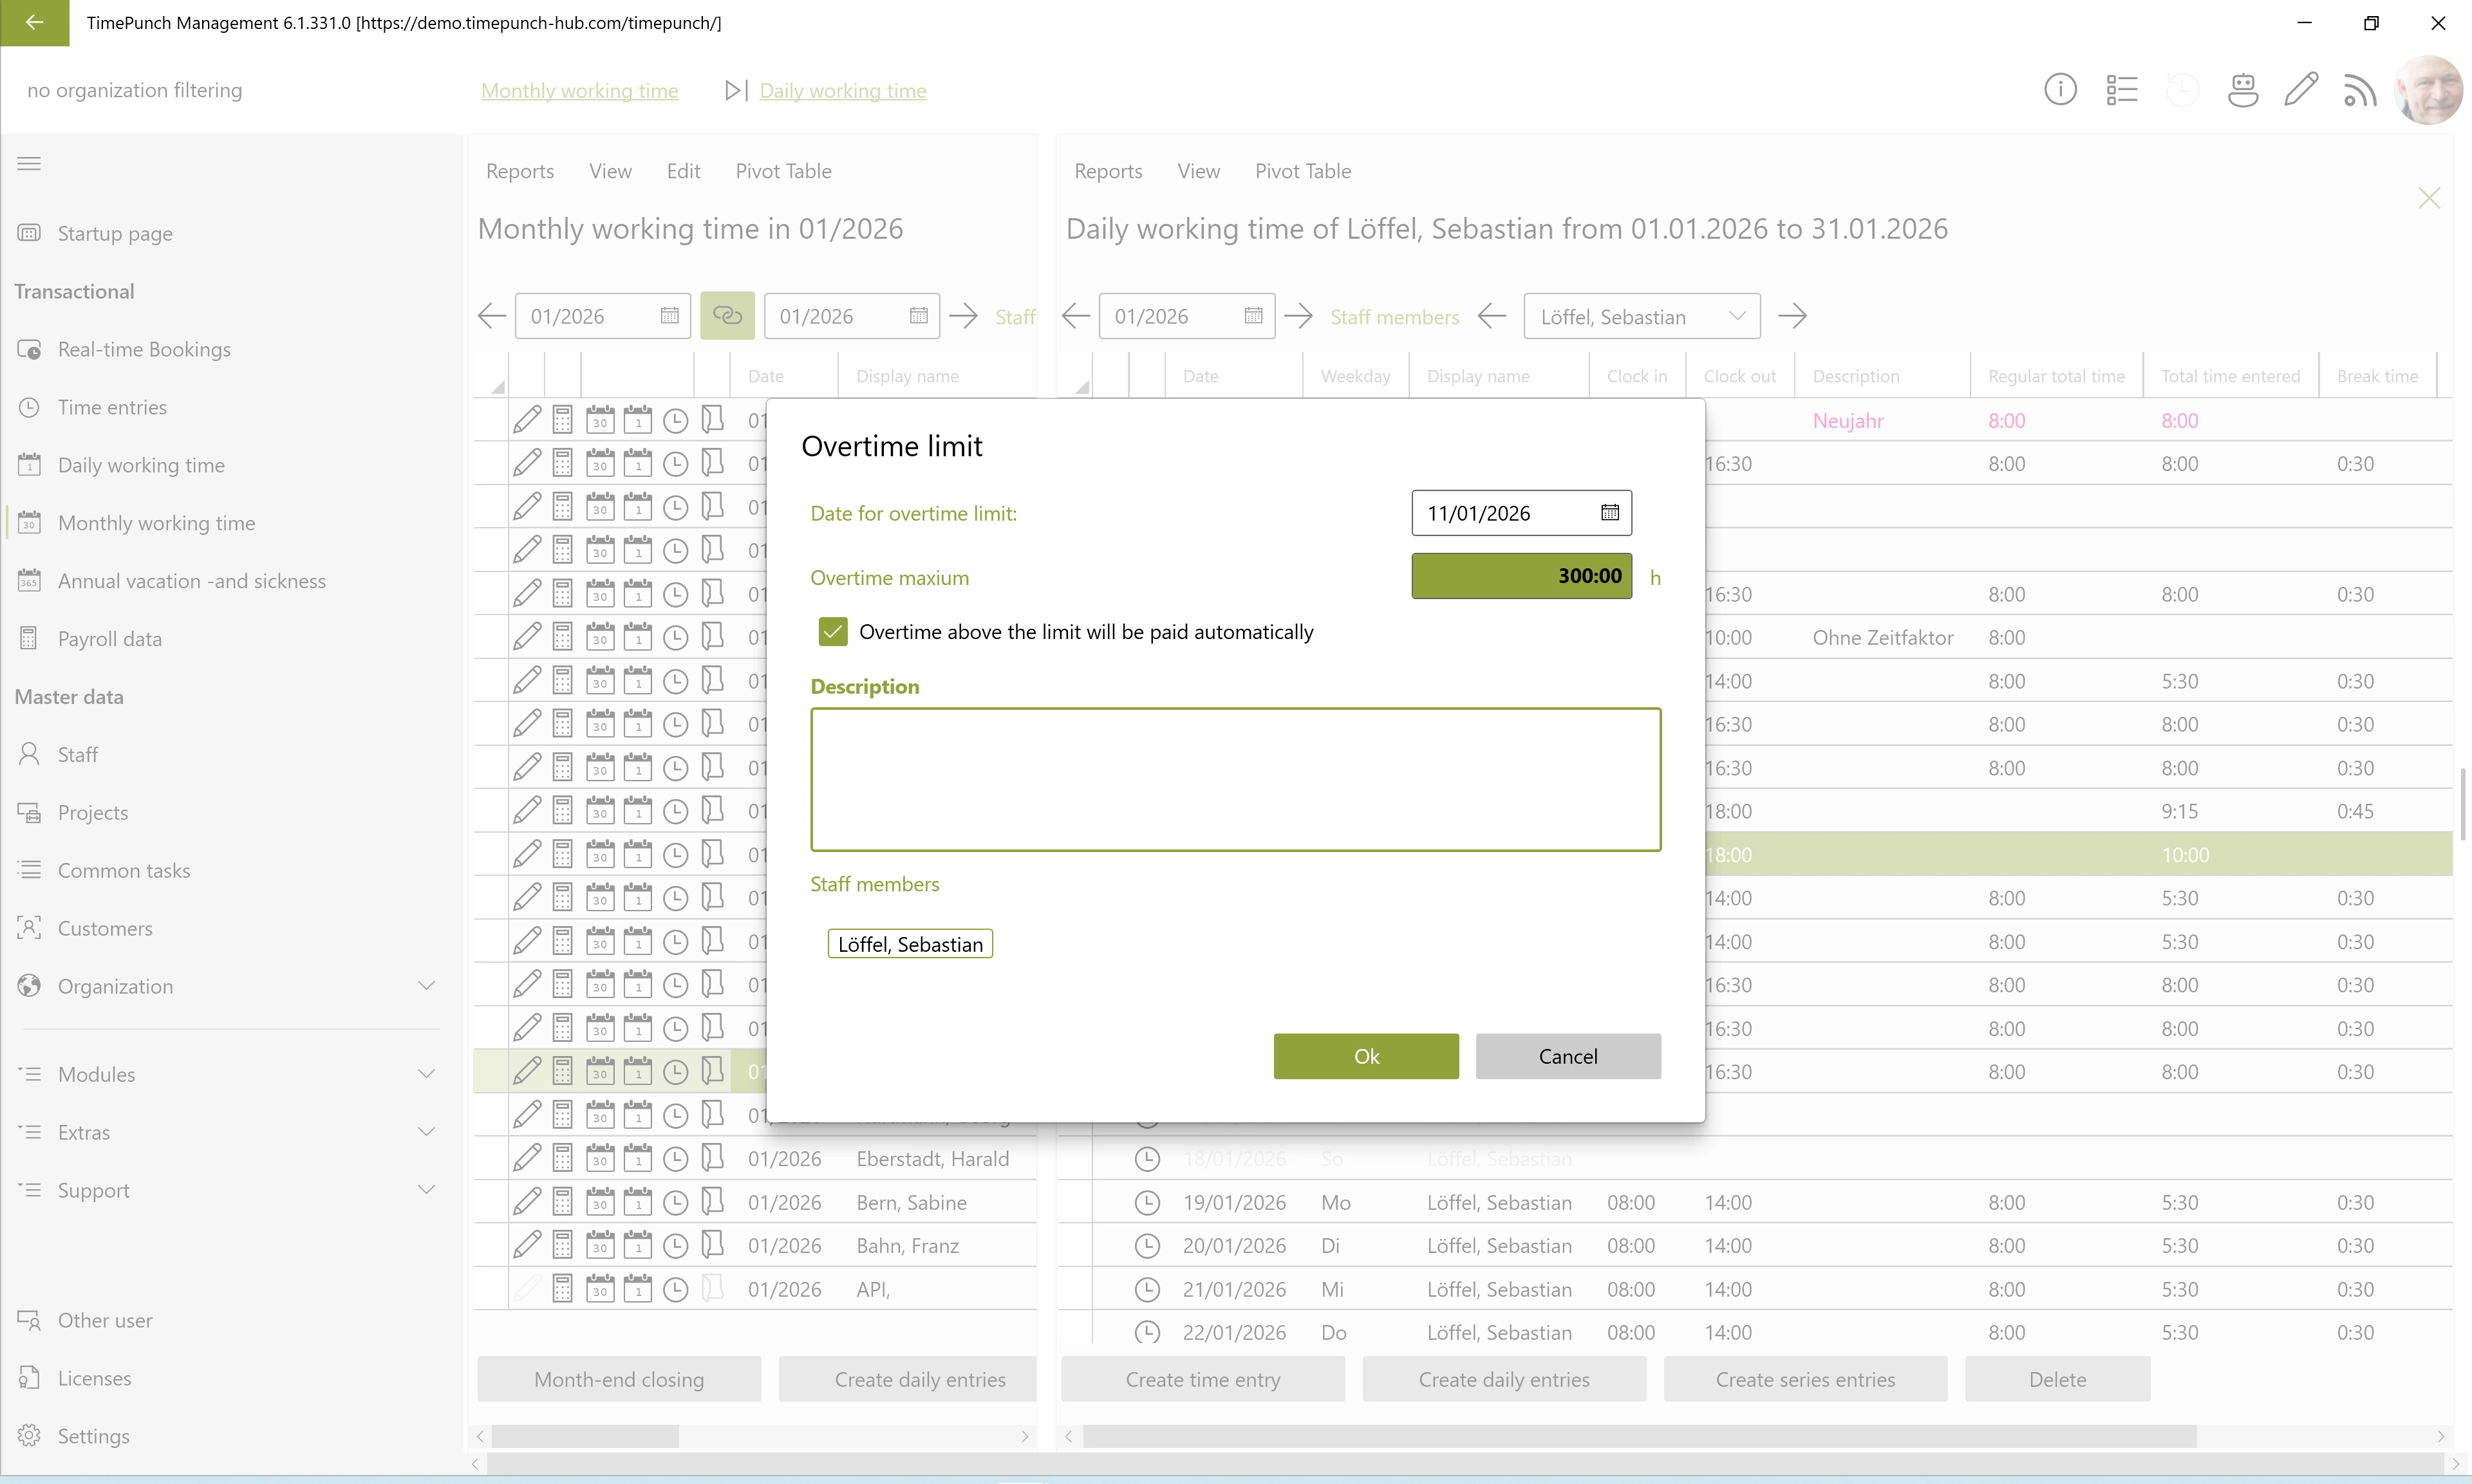
After clicking ‘OK’, the settings are saved and the overtime limit is activated for that day. This limits all accumulated overtime, not just the overtime accrued on the selected day.
Important If short-time working is stored for the selected day, no overtime limit can be entered.